by Olav Martin Kvern
Learn to install a script once—and you’ll never have to do it again.
I spent years at Adobe helping to develop, document, and popularize scripting in InDesign. I did this because I want to free creative people from the drudgery of most day to day graphic arts tasks (which I know well—Having worked as an art director, graphic designer, typesetter, and general purpose page layout lackey/slave). InDesign scripting gives graphic artists a way to automate the boring parts of page layout—which means you have more time to spend on the fun, creative parts of your work.
InDesign scripting can both lower your stress level and help you get more sleep.
Now that I’m outside Adobe, I’m having a great time working with the tools that I helped create. At the same time, as I talk to InDesign users, I’m feeling that the job I started in the late 1990s—getting the word out about InDesign automation—is, at best, only half done. The majority of InDesign users still don’t know that scripting exists, and what it can do for them. They also don’t know how to install and run a script, much less how to write one.
If I’m giving myself a grade on the job I’ve done so far, it’s an “Incomplete.” It’s high time, therefore, to get back to work. I’ll be writing scripting-related blog posts for SPI as frequently as our (busy!) work schedule permits.
What Can InDesign Scripting Do for You?
The InDesign scripting model is designed to be complete. Anything you can do with an InDesign document, scripting can do. Scripts can create and apply color swatches or paragraph styles, draw rectangles, ovals, text frames, and other page items. Scripts can resize the page, enter text, and place graphics.
If you’ve got a time-consuming, repetitive task that’s driving you crazy—moving hundreds of occurrences of a particular graphic by a specified amount in a long document, for example—it’s a prime candidate for automation. This is true even if you only expect to do the task once in your life.
There are lots of little things, too: take, for example, the process of cleaning up Word files you’ve received for placement in a layout. Typically, you search for double-spaces, tab characters at the beginning or end of lines, convert double-dashes to em dashes, and so on. You’re probably pretty good at it—but imagine never having to do that again. Scripting can make that possible—in fact, there’s a script that comes with InDesign that will do most of it for you.
Finally, there are creative effects that would be difficult or impossible to achieve by other means. Again, InDesign comes with an example of this sort of a script—the Neon.jsx script creates Illustrator-style blend effects from your InDesign objects.
Automation via scripting can improve your productivity, streamline your workflow, and provide a creative spark when you’re stuck for an idea.
Finding the Scripts Panel
First, though, you need to know that scripts appear in the Scripts panel (in InDesign CS6 and above, you can display the Scripts panel by choosing Window > Utilities > Scripts).
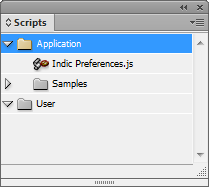
In the Scripts panel, you’ll probably see two folder icons, “Application” and “User” (for the English version of the application—other languages may use different names). Inside the Application folder, you’ll probably see a folder named “Samples,” and inside that folder, you’ll see the sample scripts that are installed when you install InDesign. I say “probably” in the preceding text because the default scripts may have been removed by some “helpful” person from your IT department (to, you know, protect you from yourself).
Running Scripts in InDesign
To run a script, double-click the script name in the Scripts panel. Most of the scripts in the Samples folder contain simple user interface elements—dialog boxes and alerts—that can let you know more about what the script does. If you want to experiment with the sample scripts, do so in an empty document; most of these scripts add new page items or change text—you don’t want them to mess up a production document just before a deadline.
About Script Files in InDesign
InDesign scripts are just text files on your system. To get them to appear in the Scripts panel in InDesign’s user interface, you need to give them a specific file extension (if they don’t have one already), put them in a specific location. Which file extension you use depends on the type of script file you’re working with. AppleScripts typically have the extension “.applescript”, VBScripts use “.vbs”, and JavaScripts use the extension “.jsx”. Note that JavaScripts can also use the file extension “.js”, but that can cause confusion with other JavaScript “flavors” on your system (notably Microsoft’s JScript, on Windows systems).
I’ll be writing about JavaScript—ExtendScript, really, an Adobe version of JavaScript that works with applications in the Creative Suite/Creative Cloud. These scripts work on both the Mac OS and Windows.
Installing a Script that Installs Scripts
If you’ve made it this far, you know that InDesign scripting exists, and you have some idea of what it can do for you. The next thing you need to know is how to install and run a script. I’m going to go one better—I’ll show you how to install a script that you can use to automate the process of installing other scripts.
Here’s what you need to do:
- Download and unzip the script .
- Display the Scripts panel, if it’s not already visible.
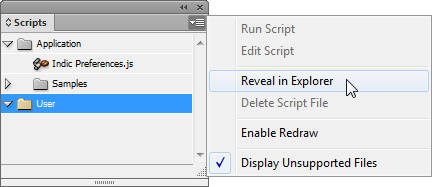
- Select the User folder icon in the panel.
- Choose Reveal in Finder (on the Mac OS) or Reveal in Explorer (in Windows) to open the Scripts Panel folder.
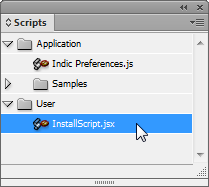
- Double-click to open the Scripts Panel folder, then copy the script (that you downloaded earlier) into the folder.
When you return to InDesign, you’ll see the script in the Scripts panel.
This is the process for installing any script—just copy it into the Scripts Panel folder. This script, however, helps you avoid the trouble of clawing your way through files and folders in your operating system—it’ll automate the process of moving the script to the right place.
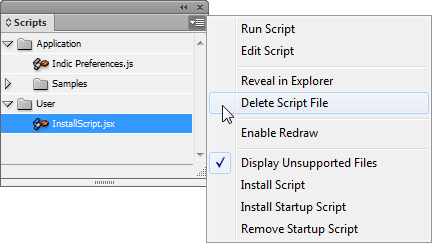
Now run the script. It won’t be obvious that the script has done anything—but it has. Display the Scripts panel menu again, and you’ll see three new menu options at the bottom of the menu: Install Script, Install Startup Script, and Remove Startup Script.
To use the script to install another script, follow these steps:
- Download the script we’ll install from here.
- Choose Install Script from the Scripts Panel menu. InDesign will display a standard Open File dialog box.

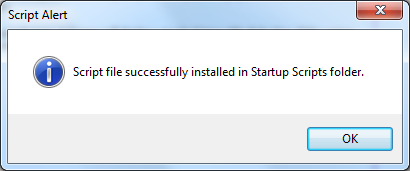
- Locate and select the script you want to install, then click the OK button. The script will display an alert that lets you know that script was successfully installed (or not).
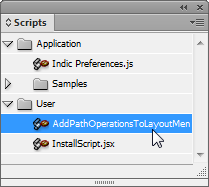
Assuming that the script installed correctly, you should now see it in the Scripts panel. If it doesn’t appear immediately, close and re-open the panel, and it should appear.
Adding/Removing Startup Scripts in InDesign
InDesign can run scripts as it starts up, which gives you a way to add features without having to run a script each time. Script-based menu customizations, such as the script we’ve just installed, are great candidates for startup scripts.
To try this out—let’s install the script we’ve been working with as a startup script. That way, the Script panel menu choices will always be available for use. To do this, follow these steps:
- Select Install Startup Script from the Scripts panel menu. InDesign will display a standard Open File dialog box. If this option does not appear on the Scripts panel menu, you’ve probably closed InDesign since you installed it. No problem—all you need to do is run the script again.
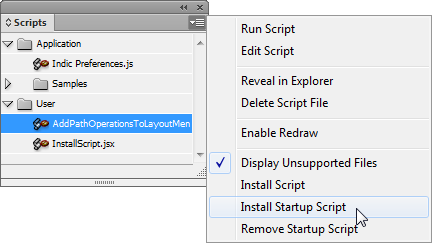
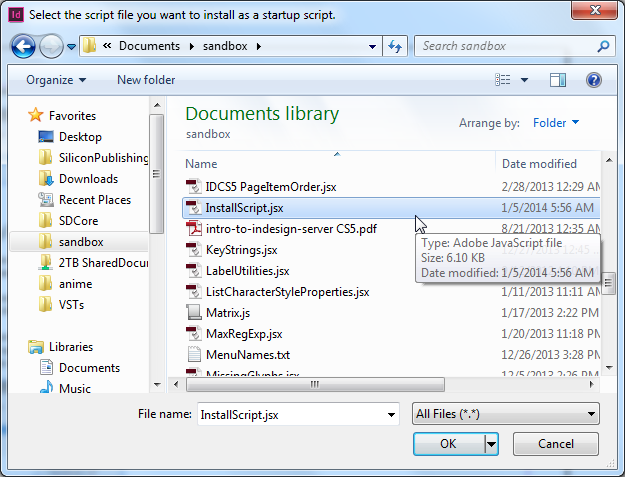
- Locate and select InstallScripts.jsx and click the OK button. The script will let you know if the installation succeeded.
If the installation succeeded, InDesign will run the script every time that InDesign starts, and our custom Scripts panel menu options will always be available.
Note that not all scripts make good candidates for installation as startup scripts. Scripts that format text, for example, will not find any text to format immediately after InDesign starts, and will sometimes generate an error.
If you install a script as a startup script and see an error, or if InDesign seems to take longer than usual to start, you’ll need to remove the startup script. To do this, follow these steps:
- Select Remove Startup Script from the Scripts panel menu (if this option does not appear on the Scripts panel menu, you’ll need to run InstallScript.jsx again). InDesign will display a dialog box listing the currently-installed startup scripts.
- Select the script you want to remove and click the OK button. The script will let you know if the removal was successful or not.
“But Wait—There’s More!”
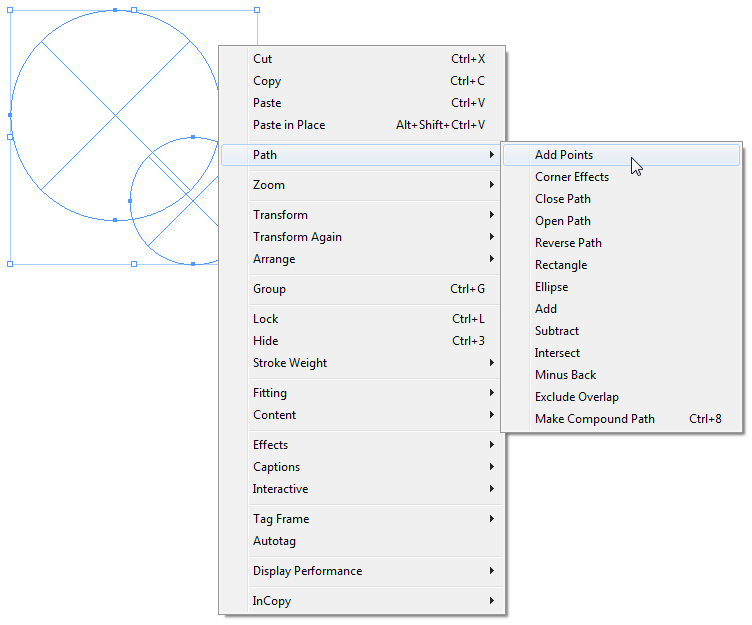
I use InDesign to draw parts for various musical electronics devices (robots and synthesizers) that I build as a hobby. Due to this (admittedly esoteric) practice, I spend a lot of time with the options on the Object>Paths, Object>Pathfinder, and Object>Convert Shape menus, as well as the AddPoints.jsx example script. While I could get at these options using various panels or keyboard shortcuts, I prefer to have them on the Context menu when I’m working with paths.
Here’s a bonus startup script for anyone doing a lot of drawing with InDesign. If you didn’t already install this above, you can download and unzip the script from here.
I’ll be back with more, as soon as I can find the time! This first post might seem pretty basic, but I’ve got more scripting tips and tricks—from simple to complicated—to share.