Silicon Connector for AEM User Guide
Installation & Licensing Instructions
Before installing Silicon Connector for AEM, close Adobe InDesign and other CC applications. To install Silicon Connector for AEM, simply run the installer provided.
Configuration
To configure Silicon Connector for AEM, you will need to edit a configuration file called SC.properties. This file is installed by default but is also included as an attachment to this article at the bottom of the page. The file is well documented and can be edited with a standard plain text editor. You’ll find the file at
Mac: /Users/username/Library/Preferences/SiliconConnector/SC.properties
Win: C:\Users\username\AppData\Local\SiliconConnector\SC.properties
Credentials
The most common property you’ll need to edit in the SC.properties file will be sc.aem_userid and sc.aem_pw. These set the username and password you use to log into AEM. To set these values, remove the leading “#” from the sc.aem_userid=admin and sc.aem_pw=admin lines and replace “admin” with your own credentials.

Proxy
If your organization’s network uses a proxy, Silicon Connector for AEM should auto-detect it and work without additional configuration. Depending on the specific network environment, this may not work and you’ll need to manually set the proxy configuration in the SC.properties file.

Scripting
For enterprise installations, configuration of Silicon Connector for AEM can be automated using scripting. At the bottom of this page, you’ll find the reference guide attached.
General use
Activation
When you launch InDesign 2020 or later, you will be presented with a dialog telling you that you’re using a trial of Silicon Connector for AEM.


Using Connector from AEM
Silicon Connector for AEM allows drag and drop directly from AEM into your InDesign Document.


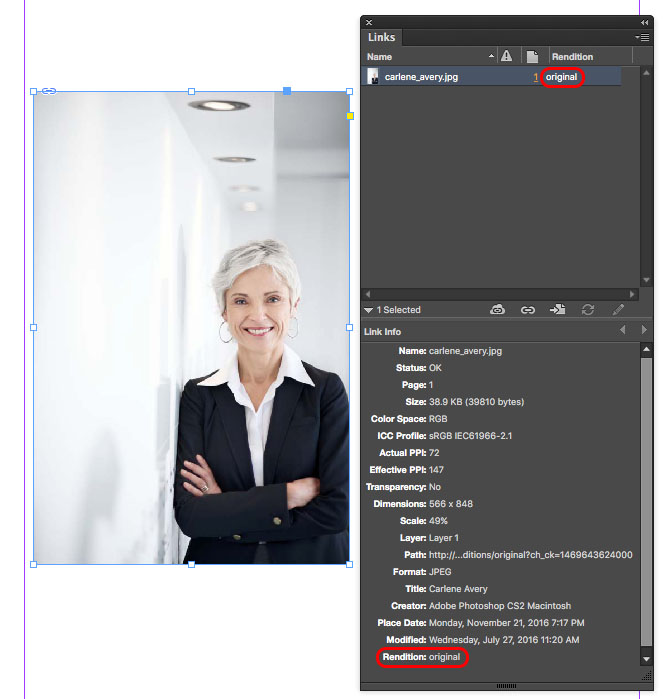
Here’s a placed Rendition:

Opening Silicon Connector for AEM
From the main InDesign menu, choose Window > Extensions > AEM CC Connector


Using Silicon Connector for AEM
Once logged in, Silicon Connector for AEM will display your Home location, where you can navigate from folder to folder, or search for specific files. Breadcrumbs are also available from the folder dropdown menu to Navigate backwards through the folder tree.

Note: If you click before the place cursor appears, InDesign will place the asset at 100%, as if you clicked the place cursor.

Supported file types
The following file type extensions are able to be placed and linked from Connector.
ai, bmp, ct, doc, docx, emf, eps, gif, icml, idms, incx, indd, indt, inma, jpeg, jpg, pcc, pcx, pdf, png, psd, rle, rtf, sct, text, tif, tiff, txt, xlsx
Search for Assets and Images
To search for a certain file type or file name, just click inside the Search field. Once you’ve entered your search term, clicking the magnifying glass will display the search results.

Silicon Connector for Dropbox Preferences
Silicon Connector for Dropbox has a number of customizable preferences to enhance your workflow, accessed from the Preferences flyout menu option.

Troubleshooting
Write to log file: When checked, creates a log file in your Documents/aem_cc_files folder
Clear log file: Click this to clear the log file.
Detail View
To download a copy of an asset from Silicon Connector for Dropbox, double-click the asset for an expanded view. Then click Download to save a local copy.
For more information on where these files are saved, see Download Options above.

AEM CC Connector Menu Listings
The AEM CC Connector flyout menu has several options to assist the user:

Working with Connector in Photoshop and Illustrator
Photoshop and Illustrator both have access to AEM CC Connector when you install the program. If you wish to edit an existing file from your AEM account, Drag and Drop your asset from Connector, just like you would in InDesign. A copy of the file will be saved locally at aem_cc_files\downloads in your Documents folder, and then opened in your Adobe app. Make your edits in Photoshop or Illustrator and save. Once your local file is saved, choose Upload from the AEM CC Connector flyout menu. You will be presented with the System browser to locate your saved file for upload.

Network Considerations
Since AEM CC Connector requires network access to AEM and the Silicon Publishing licensing server, there are certain network requirements to consider. You may find that working from home, where there is no proxy or firewall, you can use AEM CC Connector without a problem, but at work, you run into errors when trying to activate or use it.
Proxy
You can configure your proxy settings in the SC.properties file located in
/Users//Library/Preferences/SiliconConnector/ (Mac)
C:\Users\username\AppData\Local\SiliconConnector\ (Win)
This file can be edited with a basic text editor and is documented with definitions of each property. Properties should be formatted with key=value syntax, e.g. sc.http.proxy_server=proxyserver.com
Firewall
If your company has a firewall, you will need to be sure to whitelist the Silicon Publishing licensing server. The url to whitelist is https://licensing.siliconpublishing.com.
Uninstallation
Should you need to uninstall Silicon Connector for AEM, we recommend deactivating first. You can do this using the menu item Connector > Deactivate.
Installing an updated version of Silicon Connector for AEM does not require any manual uninstallation of the previous version or deactivating.
To uninstall Silicon Connector for AEM completely, you’ll need to quit InDesign, then remove the following folders:
Mac
/Applications/Adobe InDesign 2021/Plug-Ins/SiliconConnectorAEM
/Users/username/Library/Preferences/SiliconConnector
Windows
You can use the Windows Control Panel to uninstall Silicon Connector for AEM like you would any other installed application.
If you need to remove the folders manually, they are in the following locations:
C:\Program Files\Adobe\Adobe InDesign 2021\Plug-Ins
C:\Users\username\AppData\Local\SiliconConnector